Thanks to this feature, your customers can schedule an appointment at your business(es).
If you want to add this feature to your application, that is very easy. First of all, you have to click on the Booking feature: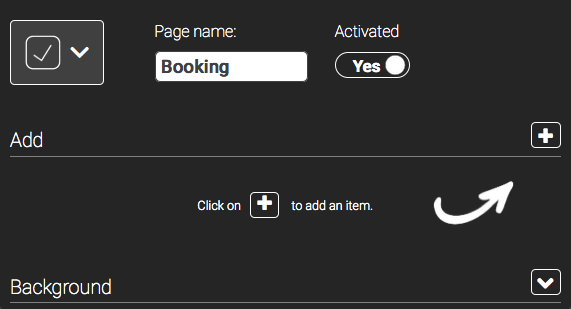
Then, you have to click on ![]() and to enter the location of your business and the email address of the manager:
and to enter the location of your business and the email address of the manager: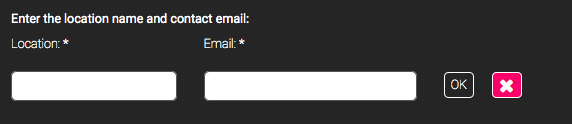
If you have several businesses, you can add these businesses to your Booking feature. To do that, you only have to click on ![]() . Then, you just have to enter the location of this business and the email address of your manager. You can do this process, as many time as you want in order to reference all your businesses.
. Then, you just have to enter the location of this business and the email address of your manager. You can do this process, as many time as you want in order to reference all your businesses.
Why these information ?
The location of your business(es) is important for your customers, so that they know exactly where they schedule their appointments.
Thanks to the email address of your manager, the application will send him an email to validate the appointment.
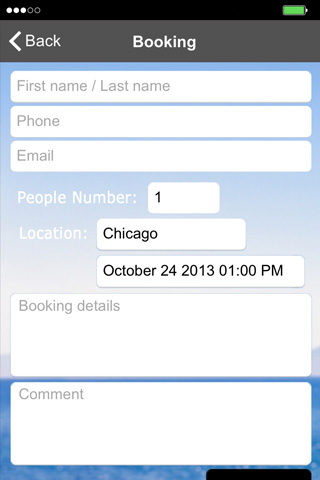
And the result: